Drain Valve Replacement in Wheaton, IL
What the Drain Valve Does
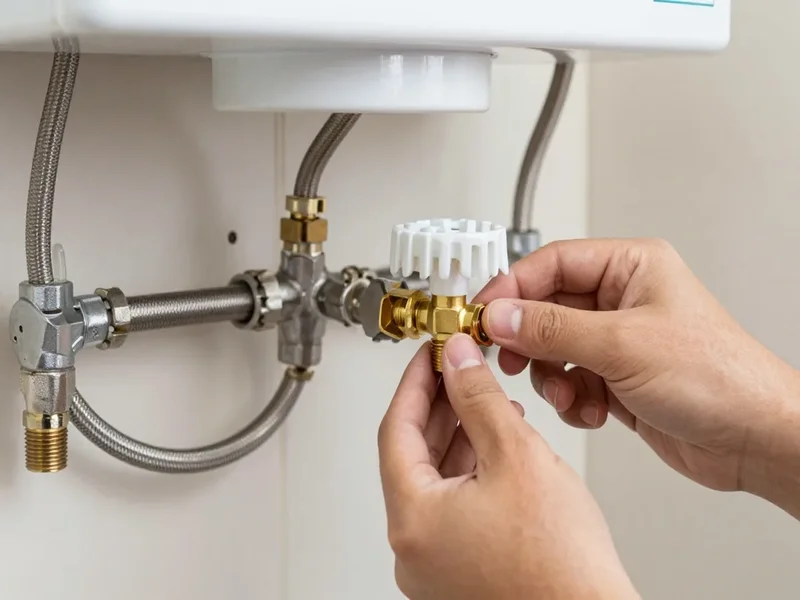
Every tank water heater has a drain valve near the bottom — a small spigot with a hose bibb connection. It exists for two jobs: draining the tank for service or replacement, and flushing sediment out of the tank bottom during maintenance. It is a humble part, but when it fails it fails messily: a cracked valve body, a stem that will not seal, or threads that snap when you touch a corroded valve can turn a routine flush into an uncontrolled drain of 40-plus gallons across your floor.
Most factory drain valves are plastic. Plastic gets the job done for years, but heat, age, and mineral exposure make it brittle — which is why the standard professional upgrade is a full-port brass drain valve that flows faster, seals reliably, and survives decades of service.
Signs Your Drain Valve Needs Replacement
- Water weeping from the valve body or around the stem, even with the valve closed
- A handle that spins without opening or closing the valve
- The valve drips after you have used it for flushing and will not fully reseat
- Visible cracks in the plastic body or white/green mineral crust around it
- A valve so corroded you are afraid to touch it — that fear is good judgment
- Very slow draining during flushes (a sign the small plastic orifice is clogged with sediment)
- A rounded-off or missing handle
- You are planning a full flush on a heater that has never been serviced and the valve is original
Common Causes of Drain Valve Failure
Age and heat cycling make plastic brittle; the valve that worked fine at year three can crack at year ten. Mineral scale builds up inside the valve and on its washer, preventing a full seal after use. Corrosion attacks the threads where the valve meets the steel tank. The most dramatic failures are human-caused: forcing a stuck valve with pliers snaps the plastic body at the threads, and over-tightening a hose connection cracks it. Sediment is a contributing factor too — a tank bottom full of hardened sediment clogs the small drain opening, tempting owners to force things, which breaks the valve.
Our Drain Valve Replacement Process, Step by Step
1. Assessment
We inspect the valve, the tank tapping threads, and the surrounding tank bottom for weeping that would indicate tank failure rather than valve failure. If the tank shell is compromised, we tell you before spending money on a valve.
2. Isolation
Cold-water inlet off, energy off (gas to pilot/off, electric breaker off). We confirm the TPR valve lifts so the tank can vent during draining.
3. Drain-down
A hose is attached to the old valve (gently — if the valve is cracked, we work around it) and the tank is drained to a floor drain, sump pit, or outside. On tanks with heavy sediment, draining can be slow; patience beats force here.
4. Removal
The old valve is unthreaded carefully. If a plastic valve has fused to the tapping, we use controlled techniques to remove it without damaging the tank threads — this is the step where DIY attempts most often go wrong.
5. Brass upgrade installation
We install a full-port brass ball-valve style drain valve with fresh Teflon tape and pipe dope. Full-port brass drains dramatically faster than the original plastic spigot and will not crack with age.
6. Refill, purge, and test
We refill with hot taps open to purge air, verify the tank is full before re-energizing electric elements, relight or restore power, run a heat cycle, and confirm the new valve seals bone-dry.
Equipment and Materials
The core of the job is the replacement valve itself — we carry full-port brass drain valves in the standard residential thread size, plus Teflon tape, pipe dope, pipe wrenches, hoses in various lengths, a wet vacuum for spill control, and thread-restoration tools for tappings that have seen better days. Because we are already draining the tank, we also carry anode rods and TPR valves for the common "while you're in there" add-ons homeowners often request.
Safety and Precautions
Draining a water heater involves scalding-hot water under pressure, so we let overheated tanks cool or drain cautiously with the hose secured — a whipping hose of hot water injures people and damages rooms. We never energize electric elements until the tank is confirmed full, and we verify the TPR valve opens before draining so the tank does not vacuum-lock or collapse. The old valve comes out only after we have confirmed the replacement is on hand; an open tapping with no valve ready is how basements flood. Homeowners attempting this themselves should know the single biggest risk: snapping a brittle plastic valve at the threads, which converts a valve replacement into an emergency tank replacement.
Local Factors: Wheaton and DuPage County
Wheaton's mid-century housing stock means we encounter original plastic drain valves on 15- and 20-year-old tanks regularly — valves that have been heat-cycling since the Clinton administration and will not survive being touched. If your heater is in that age range and the valve is original, do not attempt a DIY flush; the valve is more likely to break than to reseat. Call us at (833) 713-2101 and we will handle the flush and the valve together.
Sediment is a bigger factor here than many homeowners realize. DuPage County's Lake Michigan-sourced water still deposits minerals, and tanks that have never been flushed develop a concrete-like sediment layer that clogs the small factory drain opening. That is why the brass full-port upgrade matters locally: its larger opening actually passes sediment instead of clogging. Many Wheaton basements also lack a nearby floor drain, so we plan the drain route in advance — to a sump pit, a laundry tub, or outside — rather than improvising with a hose across finished floors. And as with all heater work in Wheaton, replacements and significant alterations fall under the City's permit requirements and Illinois plumbing code, which we follow.