Tankless Water Heater Leak Repair in Itasca, IL 60143
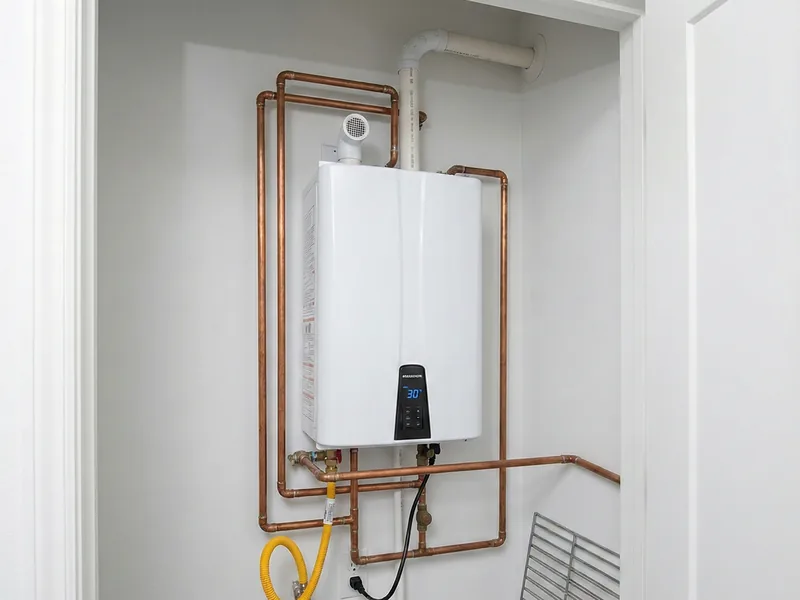
IN SHORT
A leaking tankless unit in Itasca, IL 60143 needs water, gas, and power shut off first, then a trace of the leak to the heat exchanger, a fitting, or the condensate drain. Freeze-thaw winters punish exterior installs, so we inspect the condensate path and vent run too. Call (833) 713-2101 to schedule a diagnostic visit.
Signs Your Tankless Unit Is Leaking in Itasca, IL 60143
Condensate trouble
High-efficiency condensing tankless units produce a steady trickle of acidic condensate whenever they fire, and that condensate has to go somewhere by design. When the condensate drain clogs, the neutralizer cartridge saturates, or the drain line was never properly run, the backup overflows at the unit and looks exactly like a leak. The difference matters: condensate is corrosive to concrete and metal, so a condensate overflow left alone eats the floor and the fittings it touches. If the puddle is under the condensate outlet and the water feels slightly slippery, say so when you call; it changes what we bring.
Water where it should not be
The most obvious sign is also the most urgent: water pooling beneath the unit, drips falling from the bottom panel, or a damp stain spreading across the wall behind it. Tankless units are wall-mounted, so any water on the floor below usually traces straight back to the cabinet. Look closer and you may find mineral-crusted streaks on the cover, white or greenish trails marking where water has been seeping and evaporating for weeks. A leak that leaves crust has been there longer than you think, and the crust itself tells us which fitting or seam is weeping.
Shutdowns and error codes
A tankless unit that shuts down mid-shower or flashes an error code is often protecting itself from water where the electronics live. Leaks inside the cabinet drip onto control boards, flame sensors, and ignition components, and the unit responds the only way it can: by locking out. If your hot water cuts out, the unit restarts after a while, then quits again, water intrusion is high on the suspect list. Note which code the display shows before you reset anything; that code is the first clue we use during diagnosis, and it costs nothing to write it down.
Any of these signs warrants a look before the problem grows:
- Rust-colored water at hot taps, suggesting internal corrosion is underway
- The unit shuts down or displays an error code, then works again after a reset
- White or green mineral crust trailing from a fitting, seam, or the bottom panel
- Hot water that swings between hot and cold, or takes much longer to arrive
- Water dripping from the condensate outlet or an overflowing condensate drain
- Water stains on the drywall or framing behind or below the unit
Noticed a puddle under the unit or an error code that keeps returning? Call (833) 713-2101. Shutting off the water and power to the unit before we arrive is the one step that prevents a small leak from becoming a big one.
What Causes Tankless Water Heater Leaks in 60143
Freeze damage
Water expands when it freezes, and copper does not stretch. A tankless unit's heat exchanger holds only a small volume of water in thin-walled passages, which makes it more vulnerable to freeze damage than a forty-gallon tank. Exterior-wall installations, garage mounts, and units in unheated crawl spaces are the usual victims, especially when a winter power outage disables the unit's internal freeze protection. The damage often hides until the spring thaw, when split seams and cracked solder joints start weeping. We see this pattern every year after the first deep freeze, and the repair always starts with a full inspection of every joint the freeze could have reached.
Scale: the slow killer
Lake Michigan water as delivered through the DuPage Water Commission is moderately hard, and every gallon that passes through a tankless heat exchanger leaves a trace of mineral behind. Without regular flushing, that trace becomes scale, and scale becomes an insulating blanket on the heat exchanger walls. The burner keeps firing, the metal underneath keeps getting hotter, and eventually the stressed metal develops pinhole leaks or the overheated gaskets around the exchanger give way. This is the single most common root cause behind tankless leaks we repair: not a defective unit, but a good unit that was never descaled. If your unit has gone years without a flush, scale is the first thing we check.
Installation shortcuts
A surprising share of tankless leaks trace back to the original installation rather than to wear. Venting run without proper slope lets combustion condensate drain back into the unit instead of away from it. An undersized gas line starves the burner, causing sooting and overheating that stresses the exchanger. Missing isolation valves mean the unit can never be flushed, guaranteeing the scale problem described above. We find these issues most often in units installed during rushed remodels, and part of our leak repair is documenting what we find so the underlying cause gets fixed along with the symptom.
How We Repair a Leaking Tankless Unit in Itasca
Here is the step-by-step process we follow on a tankless water heater leak repair call in Itasca, IL 60143. The order is deliberate: safety and diagnosis come before any wrench turns, and verification closes the job.
- Shut down and make safe. We start by shutting off the cold-water supply, the gas supply, and electrical power to the unit, in that order. A tankless unit under leak conditions is not something to keep running while we work, and the gas-off step is non-negotiable before any cabinet gets opened.
- Read the unit's history. Before touching a fitting, we pull the error code history from the control board and ask about the symptoms: when the leak appears, whether it correlates with hot water use, and how long it has been happening. The pattern of the failure usually points at the subsystem before we pick up a wrench.
- Isolate and drain the water side. Using the service valves, or installing them if a previous installer skipped that step, we isolate the unit from the house plumbing and drain the heat exchanger. This is also when we check whether the unit has ever been flushed; the condition of the drained water tells its own story.
- Find the actual source. With the cabinet open and the water side drained, we pressurize sections of the unit independently to find the real leak, not just the drip point. Water travels along pipes and inside cabinets, so the wettest spot is often downstream of the actual failure. We check the heat exchanger, every gasketed joint, the condensate system, and the inlet and outlet connections.
- Repair, not just patch. The repair depends on what failed: reseating and resealing a weeping fitting, replacing a hardened O-ring and gasket set, swapping a cracked flow sensor housing, clearing and rebuilding the condensate drain, or replacing a heat exchanger that has pinholed beyond sensible repair. We use manufacturer-spec parts and torque fittings to spec rather than by feel.
- Descale while it is open. Since the unit is already isolated and drained, we flush and descale the heat exchanger as part of the repair. Skipping this step would leave the root cause in place, so it is built into the process, not offered as an add-on.
- Restart, verify, and monitor. We restore water, gas, and power, purge air from the lines, fire the unit, and verify operation across its full range: steady temperature, no error codes, correct combustion, and every repaired joint dry under full operating pressure. We stay on site long enough to watch a full heating cycle complete before we call it done.
Equipment and Materials for Tankless Leak Repair in 60143
Condensate system components
Condensing units need a working condensate path: the internal trap, the neutralizer cartridge that tames the acidity before the water hits your drain or sump, and the drain line itself. We stock neutralizer media, replacement traps, and the fittings to re-run a drain line with proper continuous slope. A surprising number of mystery leaks turn out to be condensate backups, and rebuilding this path correctly ends them permanently.
Seals, sensors, and exchanger parts
The wear parts in a tankless unit are specific to the make and model: O-ring and gasket sets for the heat exchanger and water connections, flow sensor housings, inlet screens, and, when the exchanger itself has pinholed, the heat exchanger assembly. We carry common seal kits and source manufacturer-spec parts for the rest, because a gasket that almost fits is a leak waiting to happen. Every connection is reassembled to the manufacturer's torque specification, not tightened by feel.
Service valves and descaling gear
A proper tankless service starts with isolation valves, the pair of service valves that let a tech flush the unit without draining the house. Many leaking units we meet never had them installed, so we fit them as part of the repair. The descaling itself uses a circulation pump, hoses, a bucket, and a descaling solution that dissolves mineral buildup from inside the heat exchanger without attacking the metal. This is the single most important maintenance a tankless unit gets, and a leak repair is the natural moment to bring it current.
Local Factors: Tankless Leaks in Itasca, IL 60143
Tankless water heater leaks do not happen in a vacuum. The age of the house, the chemistry of the water, the brutality of the winter, and the quality of the original installation all shape which failures show up and when. Here is how those factors play out in Itasca, IL 60143:
Itasca is a small village of 1950s through 1970s homes set along Salt Creek near the Itasca Country Club.
Copper and galvanized mix through the mid-century stock, with galvanized reaching the end of its run in the oldest homes.
The Salt Creek corridor makes parts of the village genuinely flood-prone, and basement mechanical equipment lives with that risk every storm season.
Lake Michigan water serves the village, and aging mid-century plumbing means water heater components here fail on schedule, whether anyone is watching or not.
Itasca's flood-prone blocks near Salt Creek are a natural fit for wall-mounted tankless units that sit above historic flood lines, but elevation doesn't help when the leak is at a scaled heat exchanger, which is the failure we see most in units that skipped their flush schedule.
If any of this sounds like your home, call (833) 713-2101. Tell us the ZIP code 60143 and what you are seeing, and we will take it from there.
Tankless Leak Repair FAQs in Itasca, IL
Why do tankless units in Itasca develop leaks?
Direct answer: the same three culprits as everywhere else, shaped by local conditions. In Itasca's 60143 housing stock, many units are retrofits into older homes, where we find undersized gas lines, improvised vent runs, and heat exchangers that have never been flushed in moderately hard DuPage Water Commission water. Winter does the rest: exterior-wall and garage installs freeze when power drops. The local pattern is retrofit-related leaks first, scale second, freeze damage third.
Does the water in 60143 cause tankless leaks?
Direct answer: it contributes. Lake Michigan water through the DuPage Water Commission is moderately hard, and without annual flushing that hardness becomes scale inside the heat exchanger. Scale insulates the metal, the burner overheats it, and pinholes or gasket failures follow. Homes on Itasca's older plumbing sometimes add a second factor: restricted flow from corroded galvanized feeds makes the unit short-cycle, stressing every seal. A hardness test on our visit tells us exactly where your home sits on that scale.
Where are tankless units usually installed in Itasca homes, and does it matter?
Direct answer: it matters a great deal. In Itasca, we find them wall-mounted in basements, tucked into garage corners, and occasionally on exterior walls. Basement installs near the Itasca Country Club homes stay freeze-safe but can sit in damp air that corrodes fittings; garage and exterior installs face the January freeze directly. Location decides the failure mode, so the first thing we note on a leak call is where the unit lives and what that location exposes it to.
My Itasca home is older. Is a leaking tankless unit worth repairing?
Direct answer: often yes, and Itasca's housing stock is exactly why. Copper and galvanized mix through the mid-century stock, with galvanized reaching the end of its run in the oldest homes. A tankless unit with a failed gasket set or a scaled exchanger is usually a strong candidate for repair, especially when the alternative is re-piping half the house for a new install. We assess the unit's overall condition, the availability of parts, and the state of your supply lines, then give you a straight recommendation: repair it, or put the money toward replacement.
Is the water dripping from my unit supposed to drain somewhere?
Direct answer: yes, if you have a condensing unit. Condensing tankless heaters produce acidic condensate that must drain through a proper condensate line, ideally through a neutralizer. If that drain is clogged, missing, or improperly sloped, the backup overflows at the unit and looks like a leak. We check the condensate path on every leak call because it is one of the most common culprits.
Will a leak damage the electronics inside the unit?
Direct answer: it can, which is why a leaking unit should be shut down promptly. Water dripping onto the control board, ignition components, or flame sensor causes the shutdowns and error codes many owners notice, and prolonged exposure corrodes the boards. A fast repair limits the damage to the plumbing side; a slow one can turn a gasket job into a control board replacement.
Can a leaking heat exchanger be repaired, or does the whole unit need replacing?
Direct answer: small gasket and fitting leaks around the exchanger are repairable, but a heat exchanger with pinhole leaks through the metal itself usually needs replacement. The deciding factors are the number and location of the pinholes and the overall condition of the unit. We give you an honest assessment on site: if a repair buys meaningful life, we repair; if the exchanger is failing in multiple spots, we tell you replacement is the smarter money.